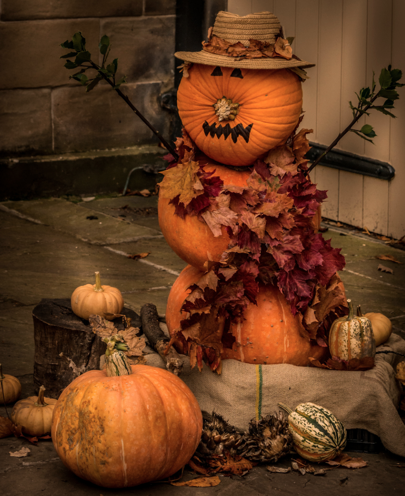
We hear it’s the season for “PSLs” and to us that means Pumpkin SCRAP Love! If you love all things pumpkins in the Fall, check out these fun creative reuse crafts – with ideas for all ages! They are definitely beyond your basic pumpkin crafts.
Learn new creative reuse crafts with materials you can find around the house and at SCRAP!
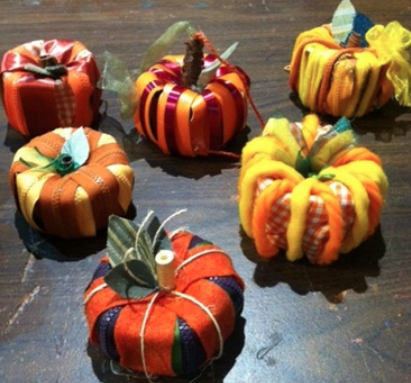
A SCRAP Creative Reuse Favorite that can include lots of different materials.
You’ll need:
Use the ring material or spool as your inner base. Strips of material are glued to core at one end, then wrapped and threaded through multiple times, leaving slack to make 3-dimensional pumpkin shape on outside. Some materials may need to be glued with each wrapping, or only glued on each end. Then glue the cork/pen cap is to the top to make a stem. Cut a leaf shape from fabric or ribbon and attach to the stem. Curling ribbon or wire could be added to make curly vines.
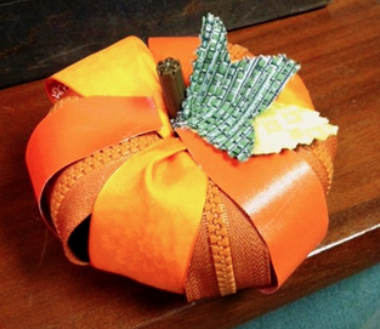
You’ve enjoyed the wine, now what to do with all the corks?
You’ll need:
Start with 4 wine works and hot glue them together to form the base. Glue them side by side and follow this pattern for each row of corks: Base Row of 4, then Row of 5 on top, Row of 6 on top, Row of 5 on top, and finally a Row of 4 on the very top, layering them on top of each other each time. Add twine, ribbon, and faux leaves, then use the last cork to glue on top as the stem, pointing up. Add some paint or leave them with the various wine colorings and you’ve put those leftover corks to fun reuse!
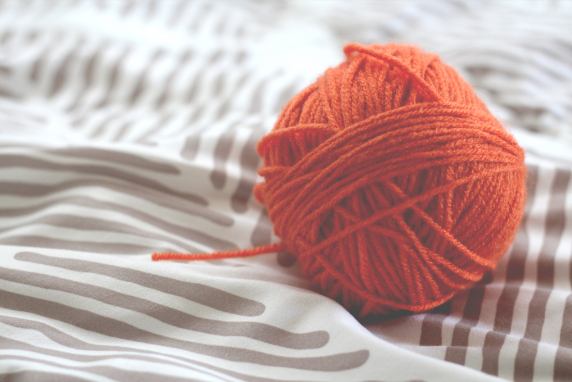
This fun and easy Yarn craft is great for all ages, no glue required!
You’ll need:
For each yarn pumpkin, wrap the orange yarn around your fingers about 120 times or so. Cut a 10 inch piece of yarn and stick it between your fingers to wrap it around the big yarn loop. Tie a knot around the big yarn loop and wrap the piece of yarn around the back side and tie another knot. Position the yarn so you have your basic pumpkin shape. Use a 2 inch piece of green pipe cleaner to loop through the knots and twist around itself to form the pumpkin stem. Make your pumpkin pretty and fix its shape. Do this for as many pumpkins as you like to make. You can turn your pumpkins into garland by taking a length of twine and stringing it through the knot strings (tying the knot strings to the twine so the pumpkin stays in place). Hang your pumpkin garland wherever you like!
We have plenty of ways to reuse those Mason Jars, but what about the lids? Check out this unique pumpkin craft!
You’ll need:
You’ll start by decorating the outside of the canning rings - either with your paint or using washi tape. Let dry if you used paint, and wrap twice and secure if you used washi tape. Once ready, create a pattern in rows, and string the wire throw them. Once they are all on the wire, pull it tight toward the center, and twist. Use your wire cutters to trim the excess wire. Arrange the rings to create a circle & place a cinnamon stick (or twig) in the middle. Use the burlap to create faux leaves or use faux leaves and hot glue them to the rings where the stem is poking out.
This is an easy one to add a little festive decoration to your guest rooms and bathrooms.
You’ll need:
Unwrap your toilet paper roll a few times and wrap it back up. This makes it a more plump pumpkin. Place the roll in the middle of your square piece of fabric with the toilet paper tube vertical. Start at one corner of the fabric pull up and push into hole. Work your way around the fabric pushing it into the center hole and tucking them in. Add your cinnamon sticks or twig for the stem, and add any crafty accessories like twine or faux leaves. When the pumpkin season is over, or you need the toilet paper, unwrap the craft and reuse the creative materials or donate them to SCRAP!
.png?216x89)
SCRAP is a 501(c)(3) nonprofit organization, Federal Tax ID 93-1270807.
Donations are tax deductible as allowed by law.
©2021 SCRAP Creative Reuse All rights reserved. SCRAP™ is a trademark of SCRAP Creative Reuse | Website by Morweb.org

-0002.jpg?1024x1024)
-0001.jpg?1024x1024)