• Contact Us
  • Creative Reuse
  • SCRAP Locations
  • Blog
 
scraplogo_ddcweb.png
  • About Us
    • Our Team
    • Board of Directors
    • SCRAP History
    • Careers
    • DEI at SCRAP
    • FAQs
    • COVID Response
  • Creative Reuse
    • What is Creative Reuse?
    • Donation Impact
    • Annual Report
  • Join The Movement
    • Getting Started
    • Webinars
    • Consulting Services
  • Locations
    • Ann Arbor, MI
    • Baltimore, MD
    • Portland, OR
    • Richmond, VA
  • Online Stores
    • PDX Online
    • A2 Online
  • Education
    • Education Offerings
    • Workshops & Events
    • SCRAP at School
    • Teacher Training
    • Virtual Workshops
  • News

Donate


News

Spring Craft Kits

Spring Craft Kits!

Featuring Instructions for:

Marble Maze

Bug Kits

Nature Journal

Felt Snail Stuffie

Find the Kits on our Online Stores!

SCRAP PDX Online

SCRAP A2 Online

Download the Lesson Plans here!


Marble Maze

marble_maze.png

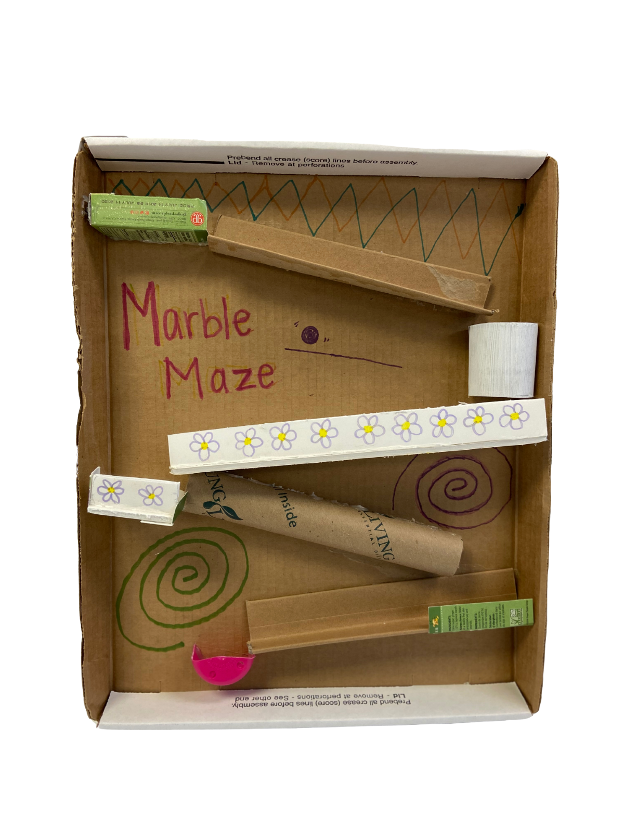
Materials & Tools Needed:

  • 1 marble (or a ball similar in size and weight)
  • 1 10”x16” (approx.) cardboard sheet or lid
  • Scrap cardboard boxes (amazon package, cereal box)
  • Cardboard tubes
  • Small cardboard cups or boxes
  • Scissors
  • Duct Tape (use hot glue for any really heavy pieces)
  • Markers for decorating

Preparation:

  1. Gather your markers, scissors, tape and marble.
  2. Check out your recycling bin for cardboard boxes and tubes.
  3. You will need a base for the marble to sit on at the top of your maze and a cup or box on the bottom to catch the marble once it has reached the end of the maze. All the exciting tunnels and planks the marble will travel through is up to you.
  4. This project may require a good deal of problem solving. Be prepared to have to take things apart and reattach when it does not work the first time to figure out how the marble will go through just right.

Instructions:

  1. Lay out the materials to see everything you have gathered.
  2. Begin to place pieces into your maze and figure out how you want your maze to look. (Do not tape or glue these pieces down yet. Just place them on your cardboard base to map out your maze.) (TIP: Ask for some help from a sibling or parent to hold some items in place while you run the marble through a section of the maze to see if it works or not.)
  3. Cut and alter your cardboard pieces to fit how you want them in your marble maze.
  4. Tape or glue down your maze in sections. Start with the beginning and do trial runs in between each section to make sure your marble is going through the way you want it to. Remove, rearrange, and reattach materials as needed.
  5. Once you have all your pieces attached you can begin trial runs with your marble. Once your marble has successfully made it through your maze three times with no issues it is DONE!
  6. Use markers, stickers, or other craft items to decorate or add text to your marble maze.
  7. Admire your awesome marble maze and see if any of your family members want to try it out!

Bug Kits

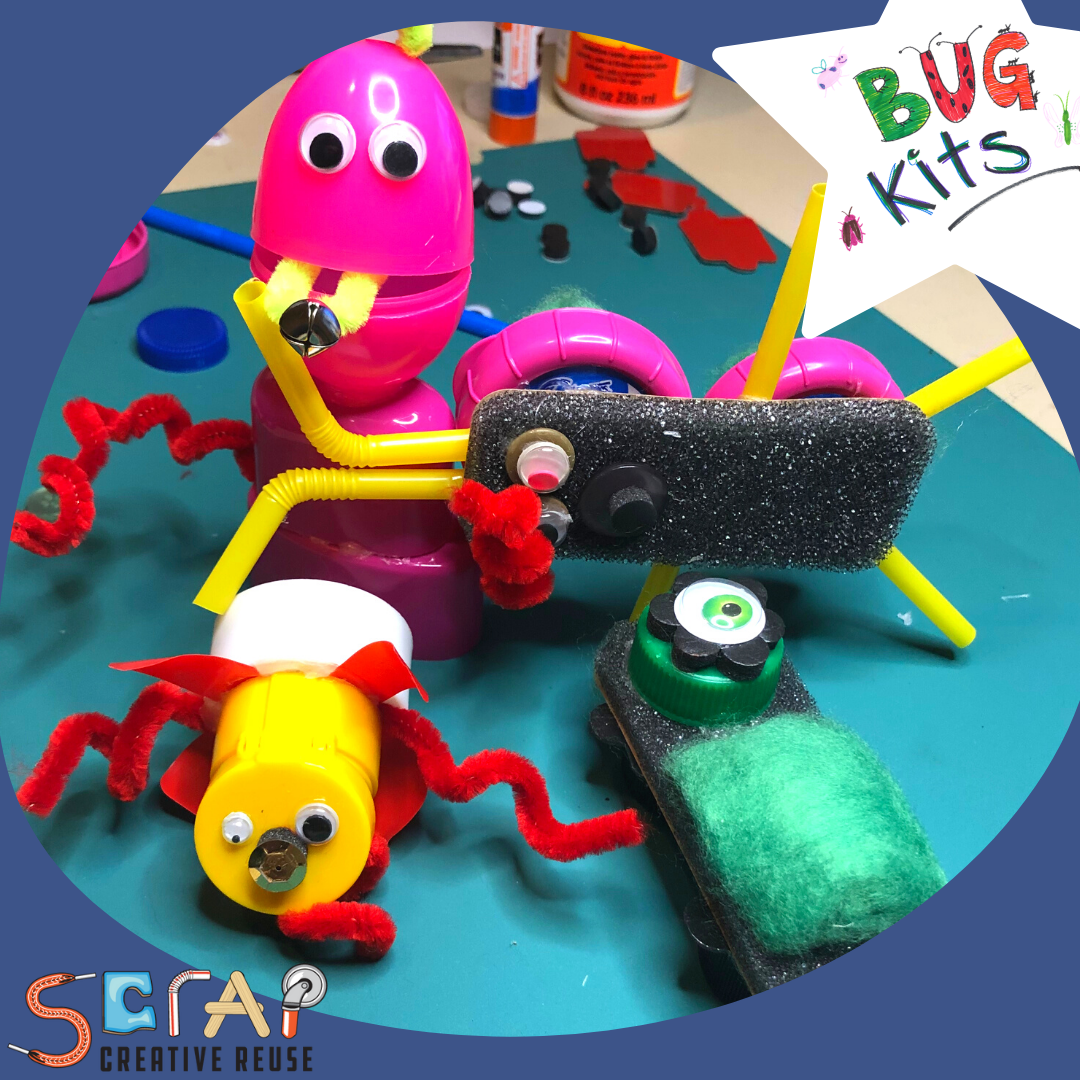
These are a Free-Create craft! The options are endless and YOU are the creator of your many bug friends!

Bug_Group_photo-0001.png

Materials and Tools Needed:

  • Various craft parts, plastics, googly eyes, straws, pipe cleaners, etc.
  • Glue, scissors

Preparation:

Layout your materials and start exploring the creatures you can create.

Play with how various craft bits can fit together

Instructions:

Glue, attach, and connect pieces together to make fun bugs from reuse items!

Check out our Inspirational Video to get some ideas!

Nature Journal

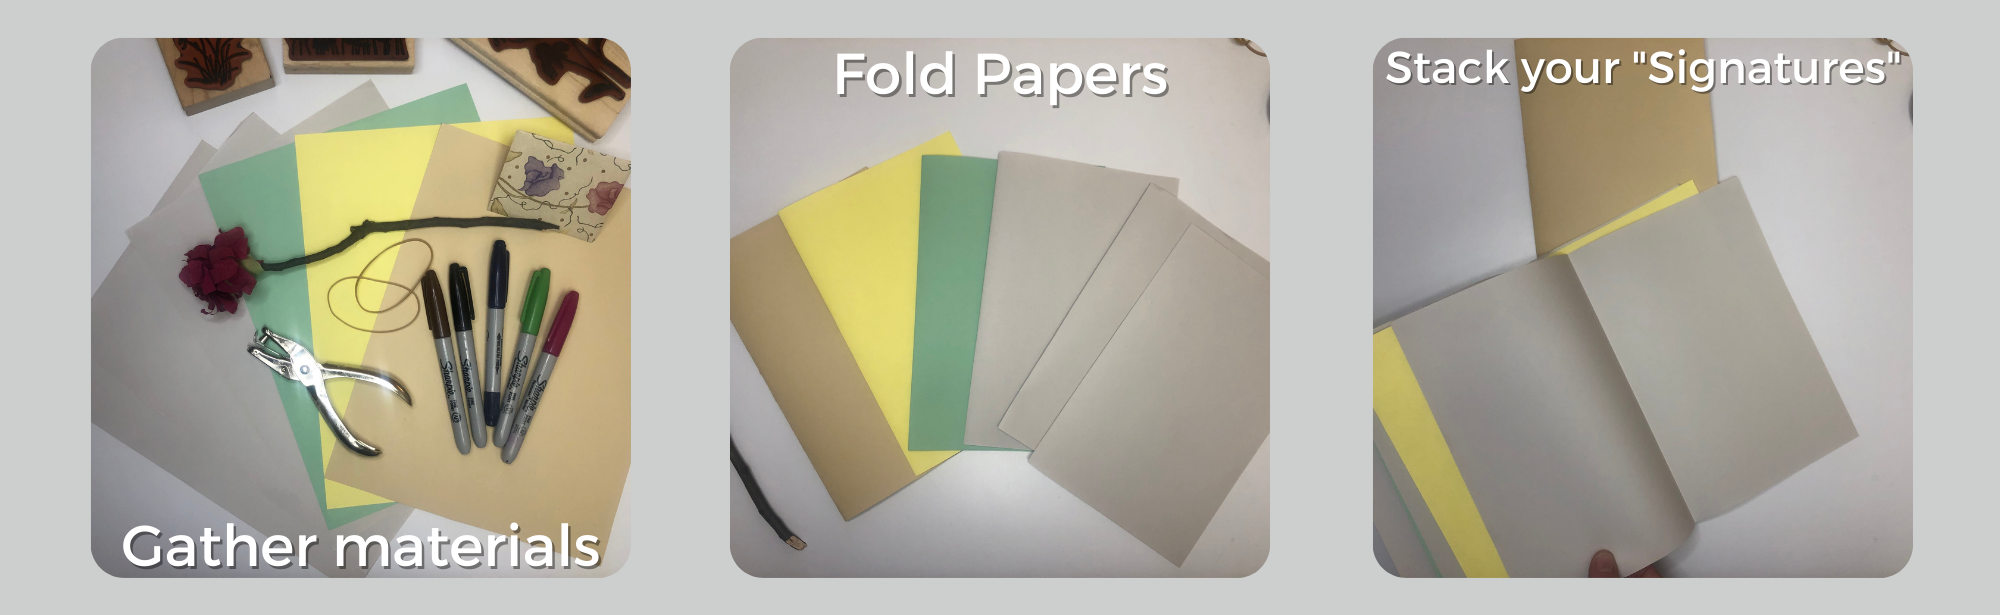
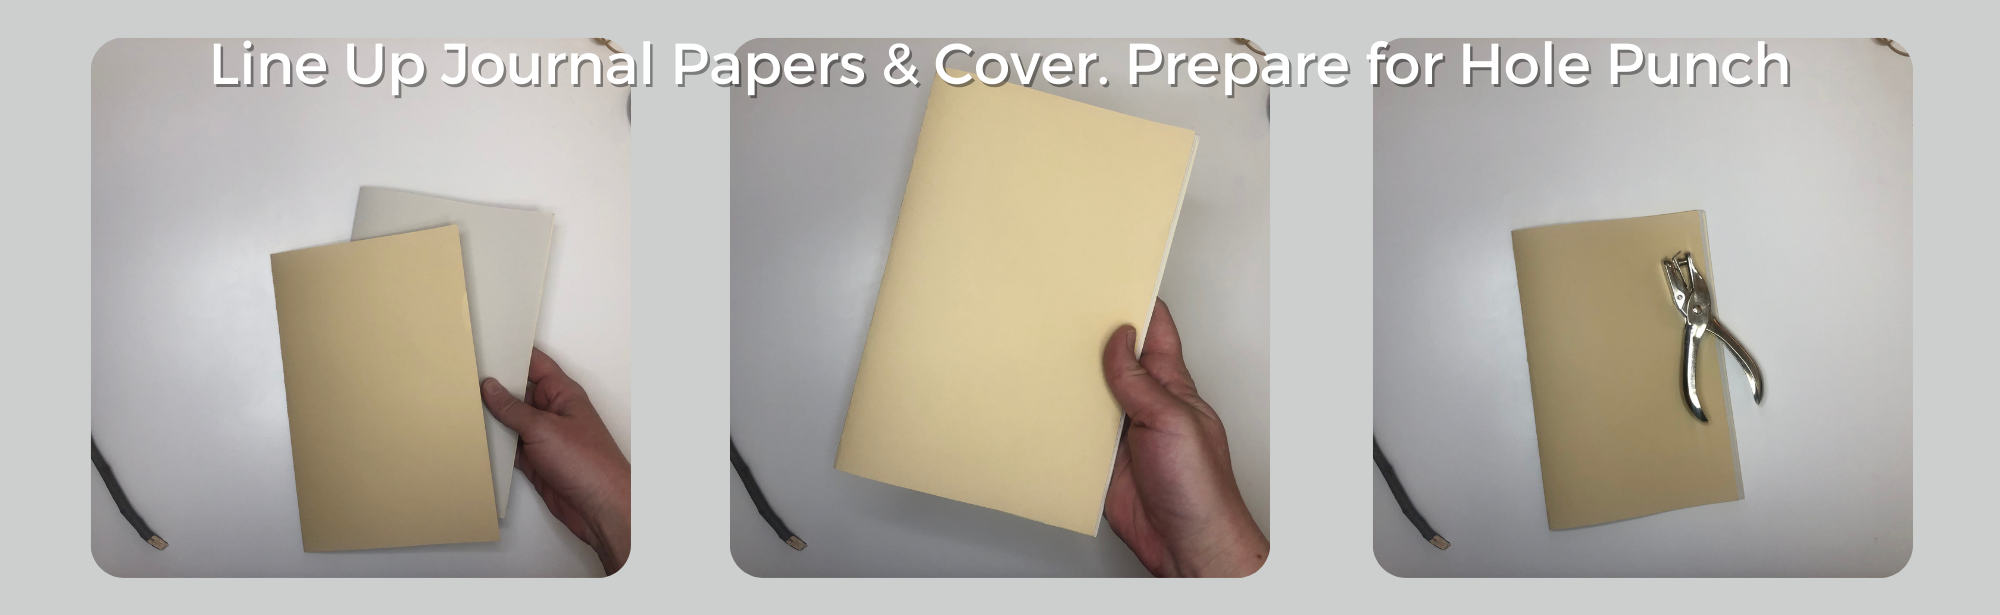
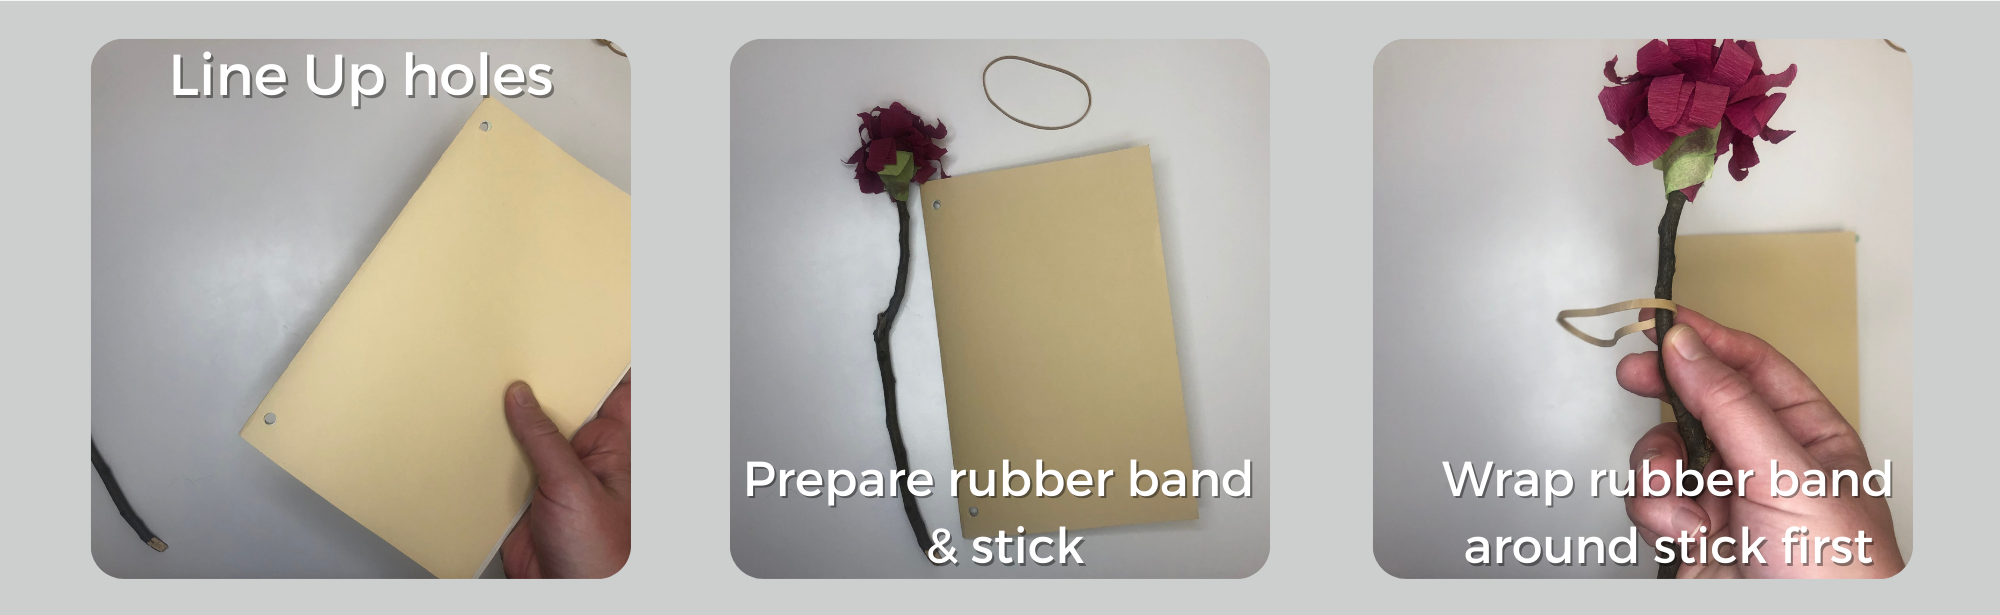
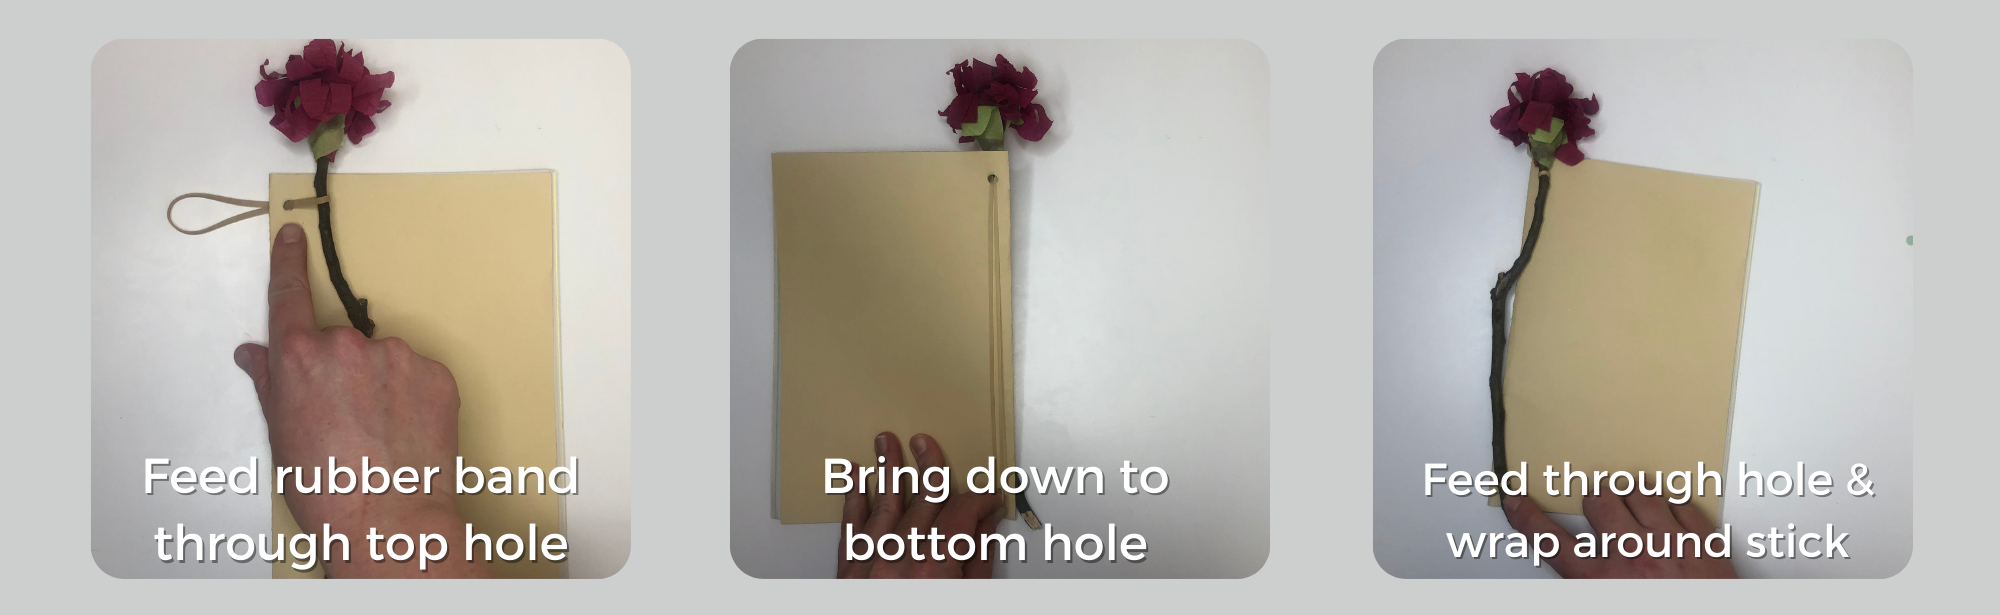
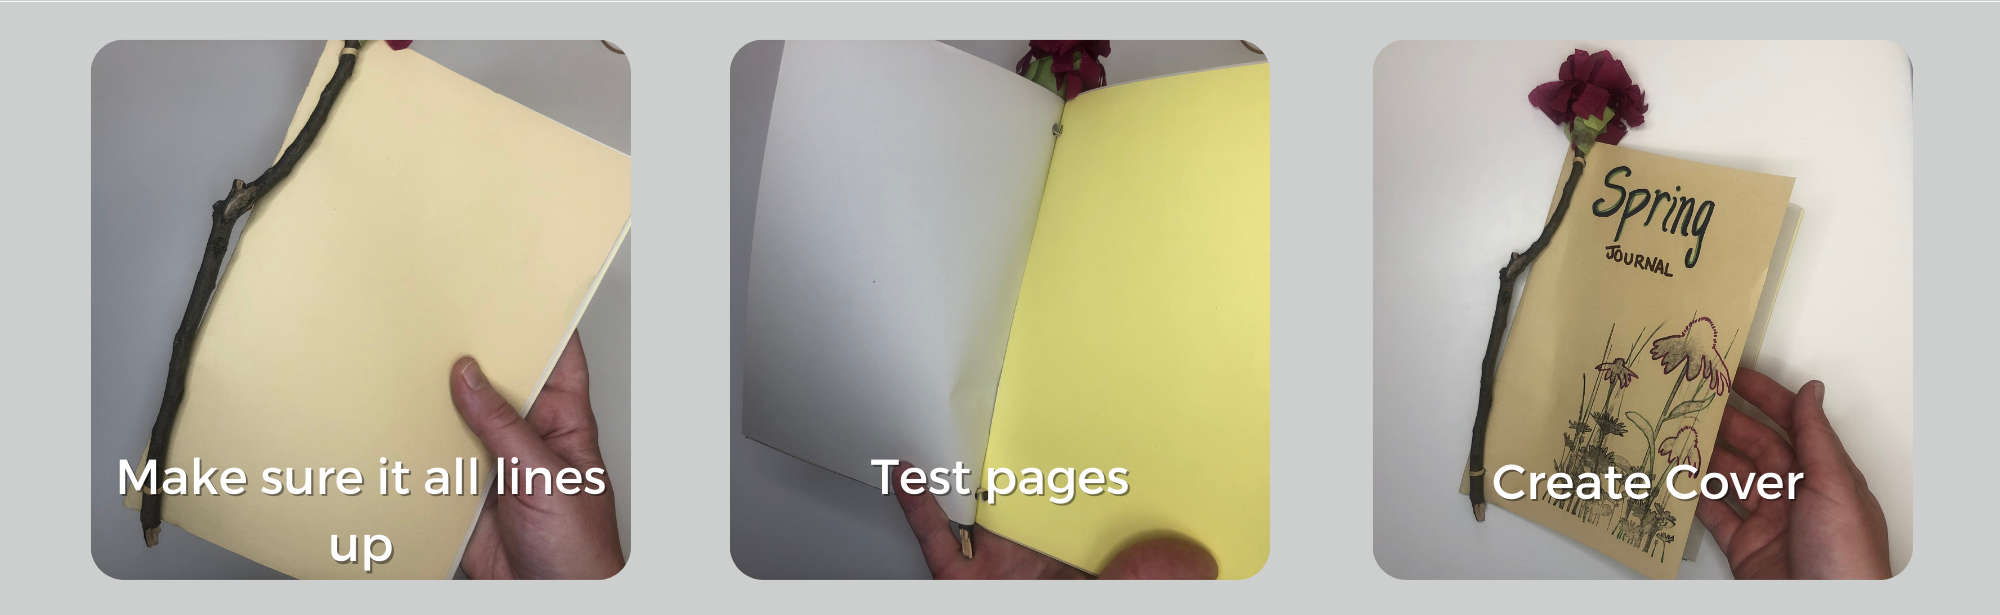
Make your own Nature Journal out of reuse paper, sticks, and rubber bands!

Materials and Tools Needed:

  • 1 stick (from a tree, or old pen/paintbrush, popsicle stick, chop stick, plastic knife, etc.)
  • 1 rubber band
  • 2 pieces of sturdy paper/cardstock for front & back covers (size: 5.5” x 8.5”)
  • 5 sheets of used-on-one-side paper (8.5” x 11”)
  • Hole punch
  • Crayons, markers, colored pencils (optional)

Instructions:

  1. Fold Sturdy Paper in half to make a 5.5”x8/5” rectangle
  2. Fold all paper pieces & stack with folded side on one side and open side on the other (called a "signature" in bookbinding)
  3. Paper is sandwiched between covers, and two holes are punched in folded side - at the top and bottom and around the length of the stick/binding tool.
  4. Rubber band is pinched and threaded through one hole, then one end of stick is inserted through rubber band.
  5. Other end of rubber band is pinched and threaded through other hole, then wrapped around other end of stick.
  6. Decorate your Journal and make it your own!

Picture Tutorial:

1-0001.png

2.png

3.png

4.png

5.png

6.png

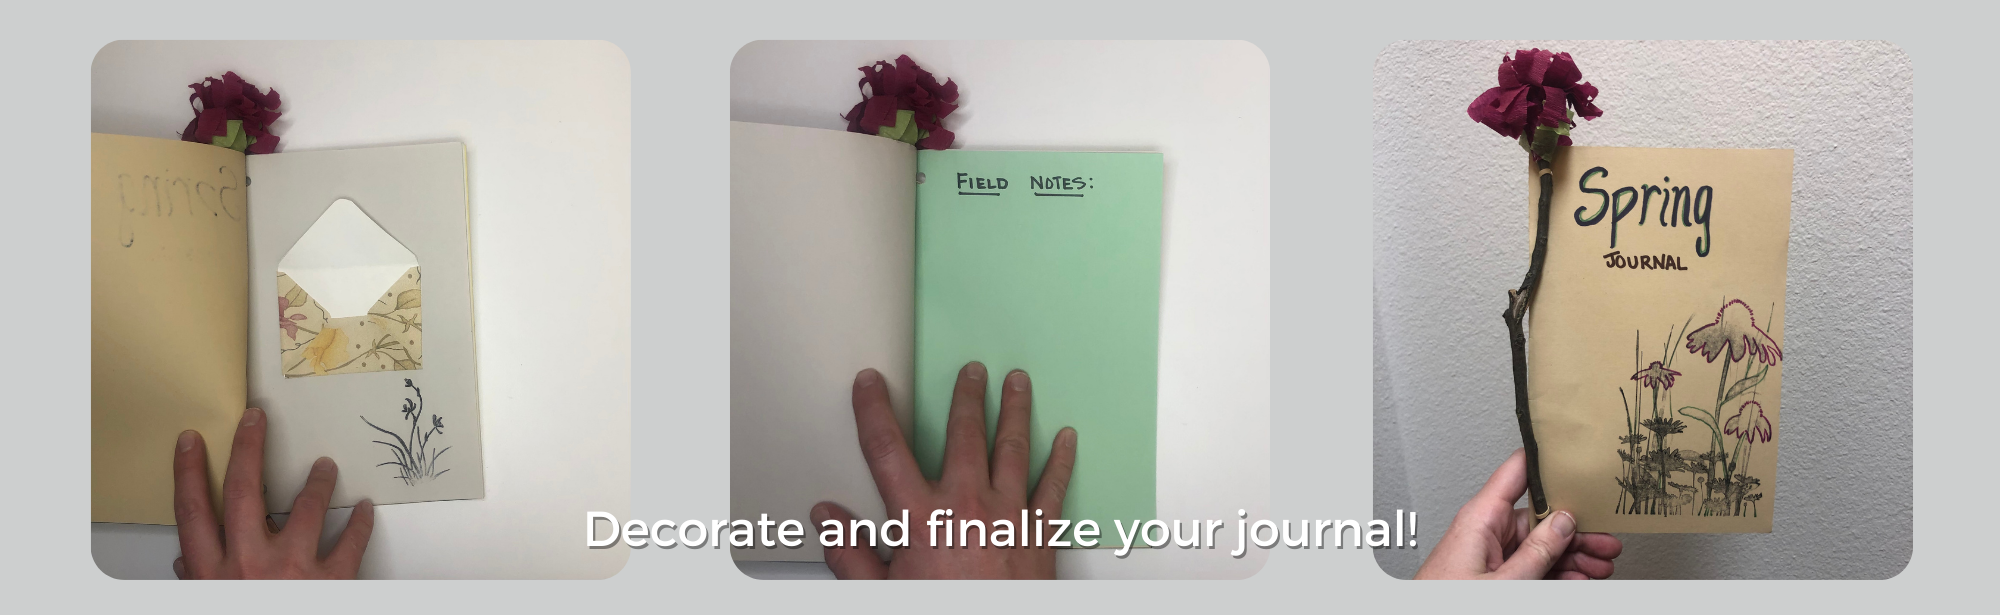
Spring Nature Craft Ideas to inspire you and nature journaling.

Bring a few extra things with you on your Nature Hikes and spark that environmental creativity!

Leaf/Bark Rubbings

Save those beautiful leaf and bark patterns you find without taking nature home with you. Using crayons or oil pastels, you can place the leaf/bark between your papers and color over in order to reveal the designs and patterns of the natural objects.

Layer patterns to create beautiful works of art. Or identify the plants and use the rubbings as identifiers.

Nature Walk Scavenger Hunt

Play "I, Spy" in Nature and go on a Nature Scavenger Hunt!

You can create your own Nature Bingo Card in your Journal before you go on your hike! Look for feathers, animal tracks, birds, bugs, flowers, plants, leaf shapes, and more!

Write a Grid with items and/or colors you want to find in Nature! Try to find and identify as many as you can.

Write down observations and inspirations from your Nature walk

Felt Snail Stuffie

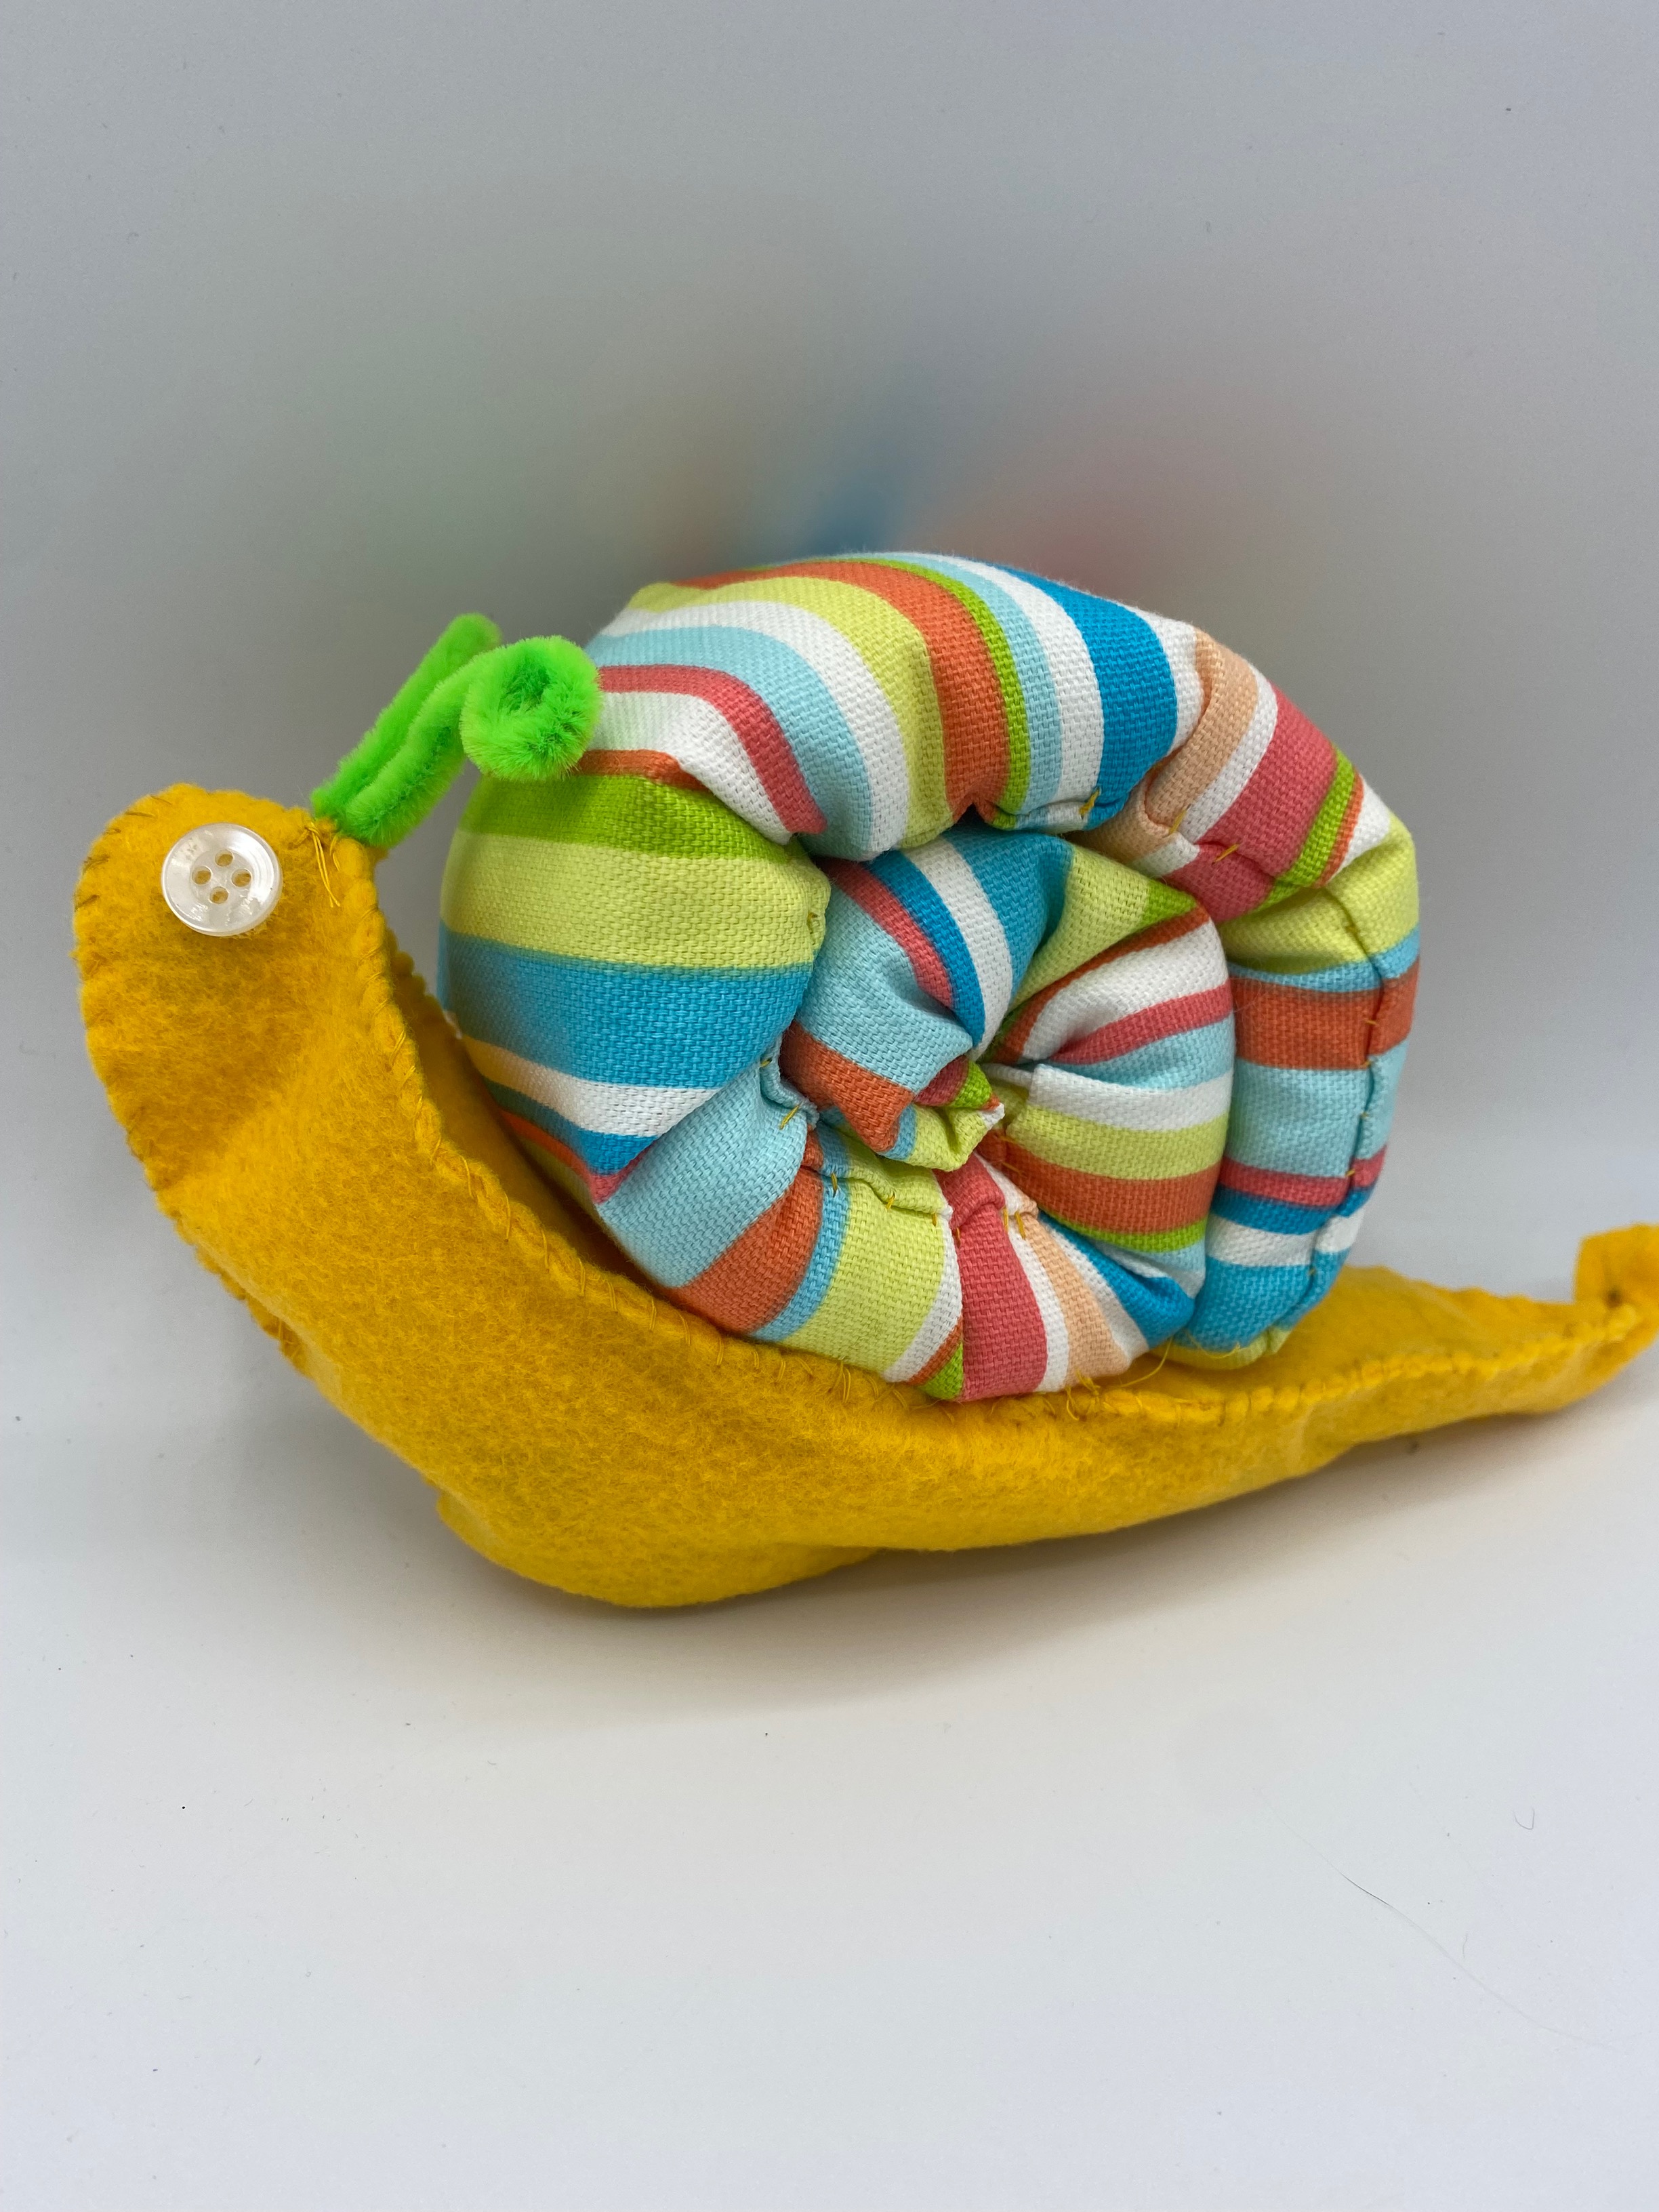
This adorable Snail Stuffie teaches great beginner sewing tips.

Snail_Stuffie_Final.png

Materials and Tools Needed:

  • Large Piece of yellow/brown felt/fleece
  • Long piece of patterned fabric
  • 1 Large needle, Pins (optional).
  • Thread/embroidery floss in yellow, cream, brown, green
  • Polyfill Stuffing/Fabric Scrap/yarn scrap stuffing.
  • Optional/preferred: weighted filling such as dry rice or beans (to weigh snail body down)
  • Scissors

Preparation/Notes:

Prep: Cut all your pattern stencils first.

Note: You can always mix-&-match felt colors, allow students to pick their own colors.

Tracing: Get the yellow/felt, trace 3 body pieces and cut out. 2 body sides and one top.

Instructions:

  1. Sew the shell. Fold fabric longways with right sides together. Sew on one short edge and one long edge (so that you make the tube inside out), then turn right side out & use provided stuffing to fluff up your shell, roll into cinnamon roll shape, stitch into place.
  2. Make the Body. Use provided pattern to cut out three sides of your snail body. Sew from nape of snail neck, overtop of head, around bottom of snail, and around end of tail.
  3. Prep the body. Cut a leaf shaped piece of felt to fill the void on the snail to create a flat back.
  4. Stuff your snail body. Fill bottom of snail with dry rice, beans, or any small weighted filler. Fill remainder of snail body with provided stuffing.
  5. Finish the body. Use a whip stitch to sew leaf shaped felt onto body to create a flat back.
  6. Attach shell to back of snail. Use the whip stitch.
  7. Finish your snail. Shove pipe cleaners into top of snail head where three pieces meet.
  8. Add eyes and embellishments.

Watch our Snail Stuffie Tutorial for helpful tips and viewing the process:

Now get outside and start crafting this Spring!

Latest Posts

SCRAP PDX Return to the East Side!

For Immediate Release


scraplogo_ddc(1).png

 619 SE 6th Ave, Portland, OR  97214
503-294-0769

SCRAP is a 501(c)(3) nonprofit organization, Federal Tax ID 93-1270807.
Donations are tax deductible as allowed by law.

©2021 SCRAP Creative Reuse All rights reserved. SCRAP™ is a trademark of SCRAP Creative Reuse | Website by Morweb.org